As I very much promote stitching with a sewing machine, reposting this information feels kind of important. Such a small part of a sewing machine - yet without it not a stitch could be made! When difficulties with stitching on a sewing machine occur, stitchers can be very quick to put problems down to user error. Whilst this is sometimes the case of course, very often it is the sewing machine needle that is the real culprit!
In the same way as using a hammer to put in a screw is unlikely to go smoothly, using an incorrect machine needle to stitch is also likely to cause your grief. Yes you can keep ploughing on stitching in the hope that all will come right, but far better to stop and take stock. The first question to ask yourself is do you actually know what needle you have in your machine - it's amazing how often we haven't got a clue! I know, needles are not what most stitchers would call a sexy subject - but seriously, a few facts about basic needles will save you hours of grief. I'll kick start with the machine needle anatomy - not too much to take in.
The shank on a domestic needle is rounded at the front and flat at the back - remember this when you insert the needle into the machine. Next I'll do the needle numbers which range from 60/8 to 120/20 - there are 2 numbers to cater for European and American sizing. The larger of the two numbers indicates the diameter of the needle shaft so a 90/14 needle is 0.9mm in diameter. I wouldn't mind betting that you have a pack of universal machine needles in your stash with a range of numbers on the outside. Universal needles are good for all sorts of routine stitching jobs and you may have got by for years on these. However, if you're working with layers of fabric and/or metallic or embroidery threads, there are other needle options that will make stitching more straightforward and trouble free.
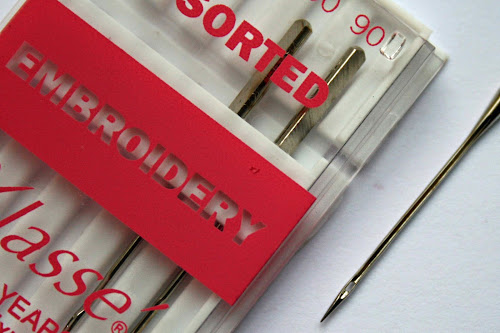
So moving on to specific types of needles with their various 'eyes' and 'points'. I'll start with the embroidery needle that is excellent for rayon embroidery threads. It has a longer 'scarf' on the back of the needle and a larger eye to effectively manage the thread. Choose from 75 for finer threads and 90 for thicker threads.
Sticking with embroidery, on to the metallic needle. Metallic threads are notorious for causing stitching problems and no more so if the wrong needle is being used. The metallic needle comes in sizes 80 and 90 and has a distinctly elongated eye which prevents the thread shredding. Oh and as an aside, stick to good quality metallic threads and avoid the 'bargain thread basket'.
Next to my much favoured topstitch needle in size 90. It similarly has an elongated eye to accommodate a thicker thread. I personally use this needle for all types of embroidery threads BUT keep each needle to one type of embroidery thread. Amazing as this sounds, when embroidery thread whizzes through the needle eye it creates a groove particular to that type of thread inside the eye. If you then change the thread and keep the same needle, there's a chance that the thread will start to catch inside the eye and break - REALLY!
Changing tact to fabrics I'll pick up on quilting needles which come in sizes 75 to 90. They are thinner and more tapered to enable the needle to move through multiple layers of fabric without skipping stitches. The same rule applies - the thicker the fabric the bigger the needle number.
Next up, the Jeans needle in sizes 70 to 110 for densely woven fabrics and some quilters use these for very thick quilting jobs.
And on the home straight, the Ball Point needle in sizes 70 to 100 for sewing knitted fabrics - the rounded point does not damage the knitted fibres.
And last for this post, you might be relieved to hear, is the Stretch needle, with a medium ball point to cope with stretch fabrics as it says on the tin.
Now if you've reached the end of this post and not dibbed out on route, then well done you! If the sewing machine needle has never got onto your stitching radar, then I hope that this post has rectified this oversight. The general rule is that even when stitching with the same thread and fabric, a needle should be changed after 4 hours of stitching - ok some rules can be broken a little. This said, I promise you that using the right needle in your machine will make the world of difference. Humble the sewing machine needle may be, insignificant it is definitely not.


No comments:
Post a Comment